Getting a toilet partition quote used to mean phone tag, emailed sketches, and a week of waiting before you even saw a number. If you’re a facility manager or contractor trying to keep a renovation on schedule, that back-and-forth is time you don’t have.
That’s why we built the Mavi New York online partition planner. In about five minutes, you can configure your exact restroom — any layout, any material, urinal screens and all — and submit a quote request that our estimators answer during office hours (Mon-Fri 8:00am-5:00pm). No account, no fees, no guesswork.
Here’s exactly how it works, step by step.
Step 1: Choose your construction type
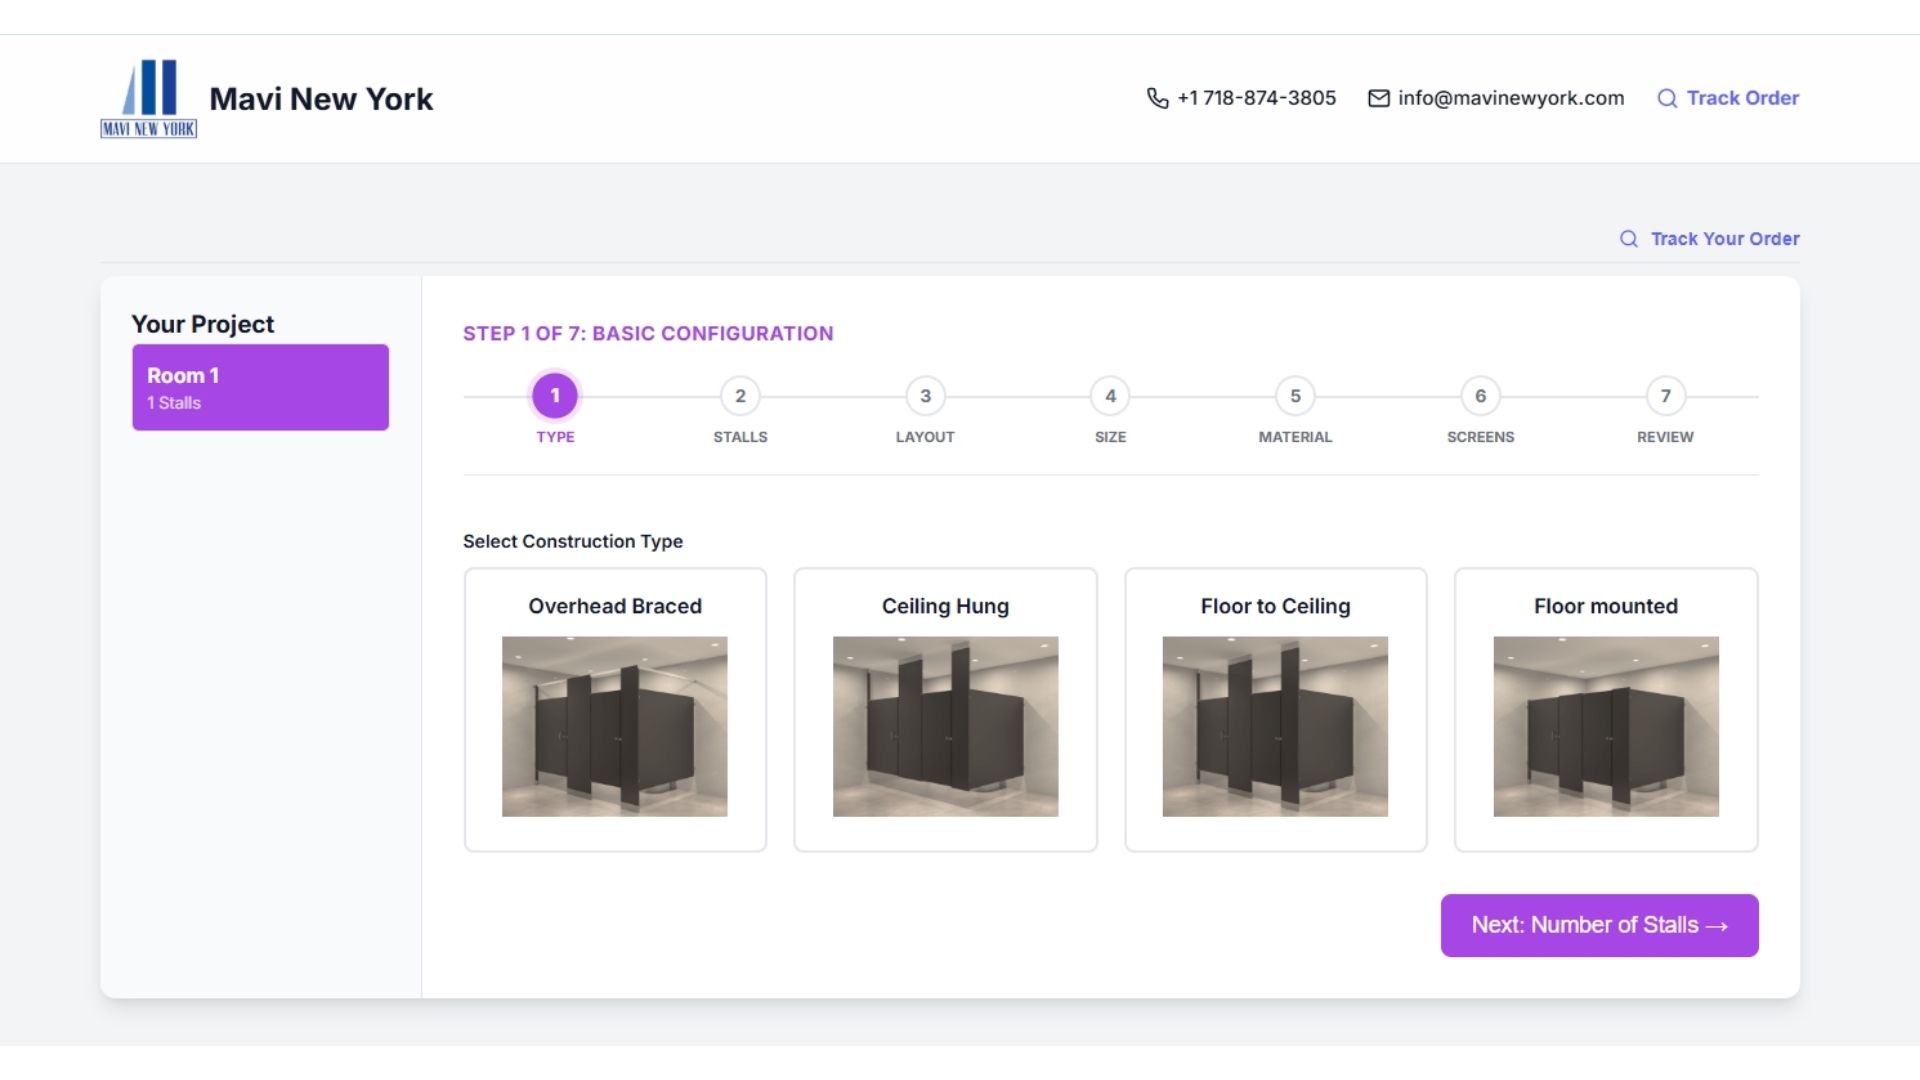
Head to getaquote.mavinewyork.com and you’ll land on the first of seven quick steps. Start by picking how your partitions mount:
- Overhead braced — the most common style, with an aluminum headrail running along the top for stability. A safe default for most commercial restrooms.
- Ceiling hung — panels hang from structural supports above the ceiling, leaving the floor completely clear for easy mopping. Popular in airports and upscale offices.
- Floor to ceiling — anchored at both ends for maximum rigidity in high-abuse settings.
- Floor mounted — supported by floor-anchored pilasters only, for a cleaner sightline.
Not sure which fits your building? Pick the closest match — you can mention questions in your submission, and our estimators will flag anything that needs adjusting.
Step 2: Name your room and set the number of stalls
Give the room a name you’ll recognize later — “1st Floor Men’s Room” beats “Room 1” when you’re managing a multi-restroom project. Then use the plus and minus buttons to set your stall count. The planner draws the stalls on screen as you go, so you can see the configuration take shape.
Step 3: Pick your bathroom layout — standard or ADA
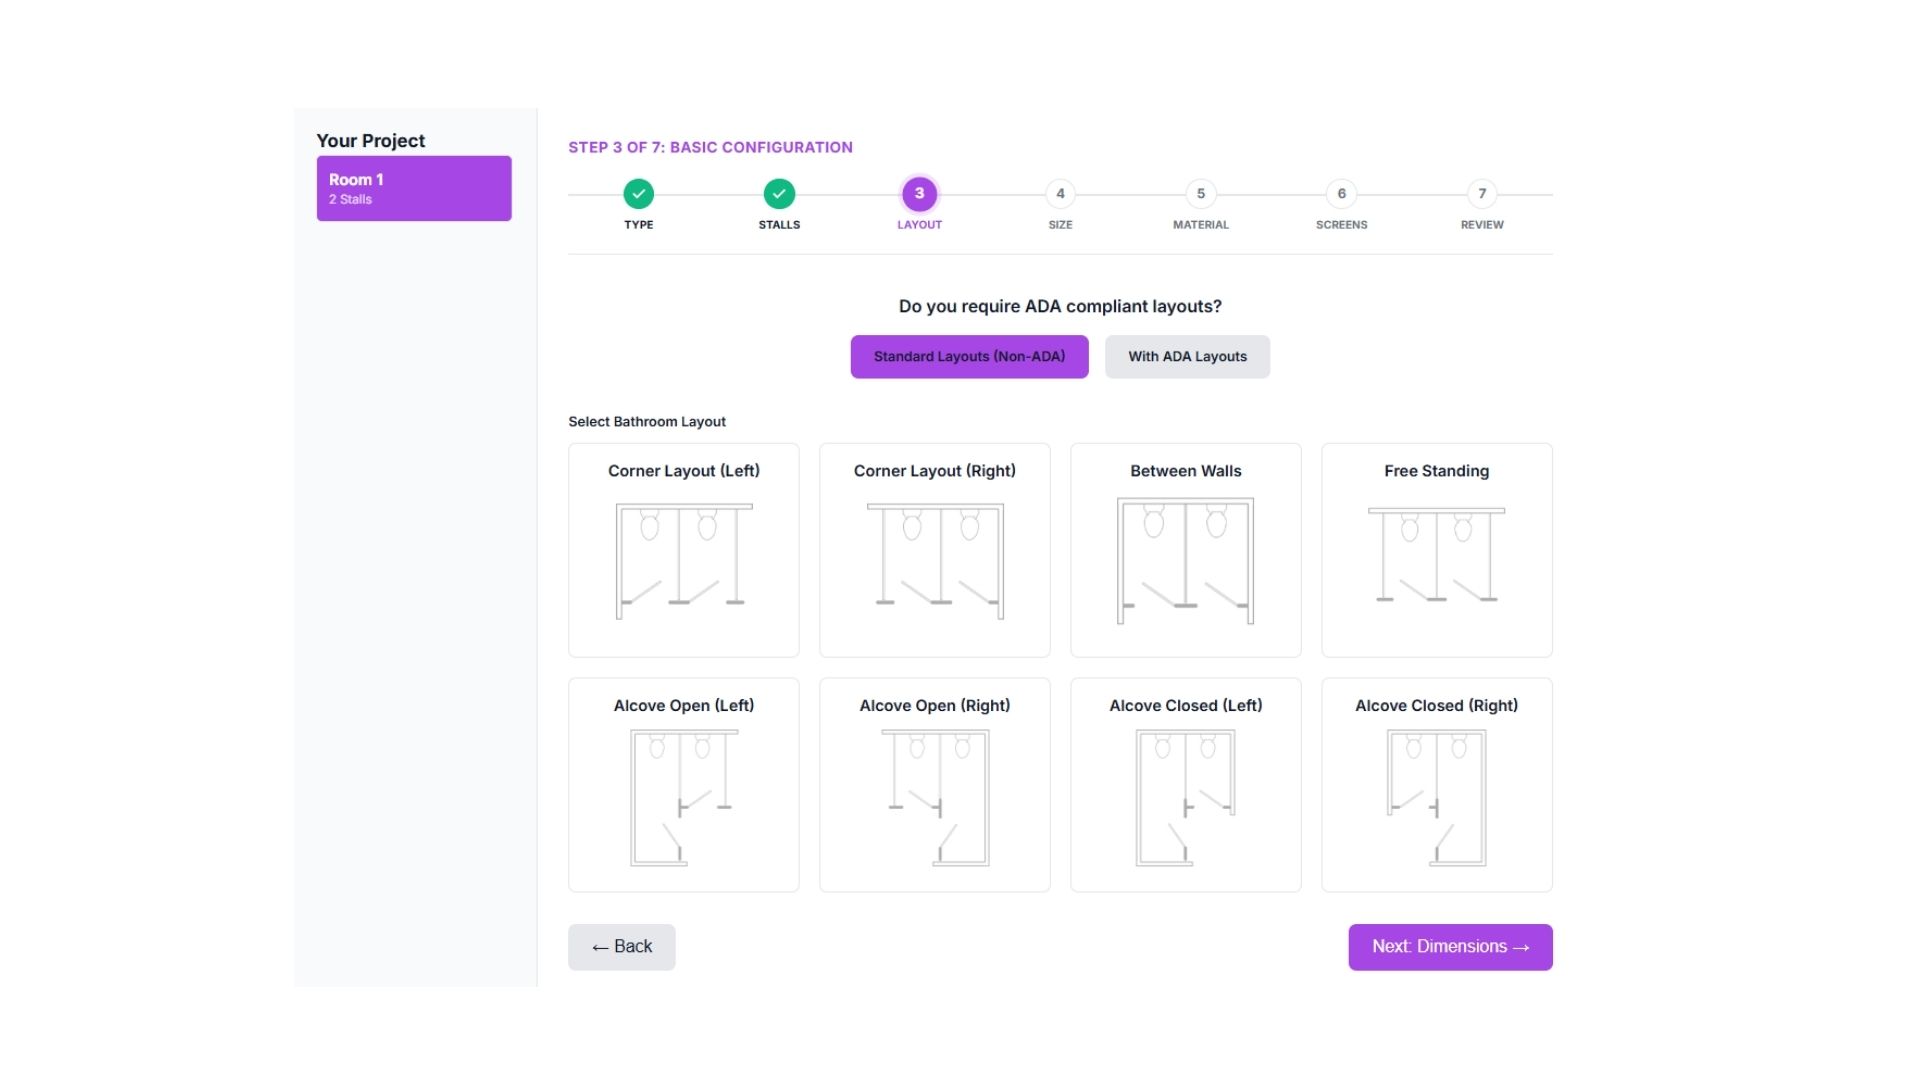
This is where the planner really earns its keep. First, tell it whether you need ADA-configured layouts. Toggle “With ADA Layouts” and the planner presents configurations designed around accessible-stall requirements — a detail that’s easy to get wrong on paper and expensive to fix after installation.
Then choose the layout that matches your room: corner (left or right), between walls, free standing, or alcove — open or closed, left or right. Every option comes with a floor-plan diagram, so you’re matching pictures to your actual room instead of decoding jargon.
Step 4: Enter dimensions and door details
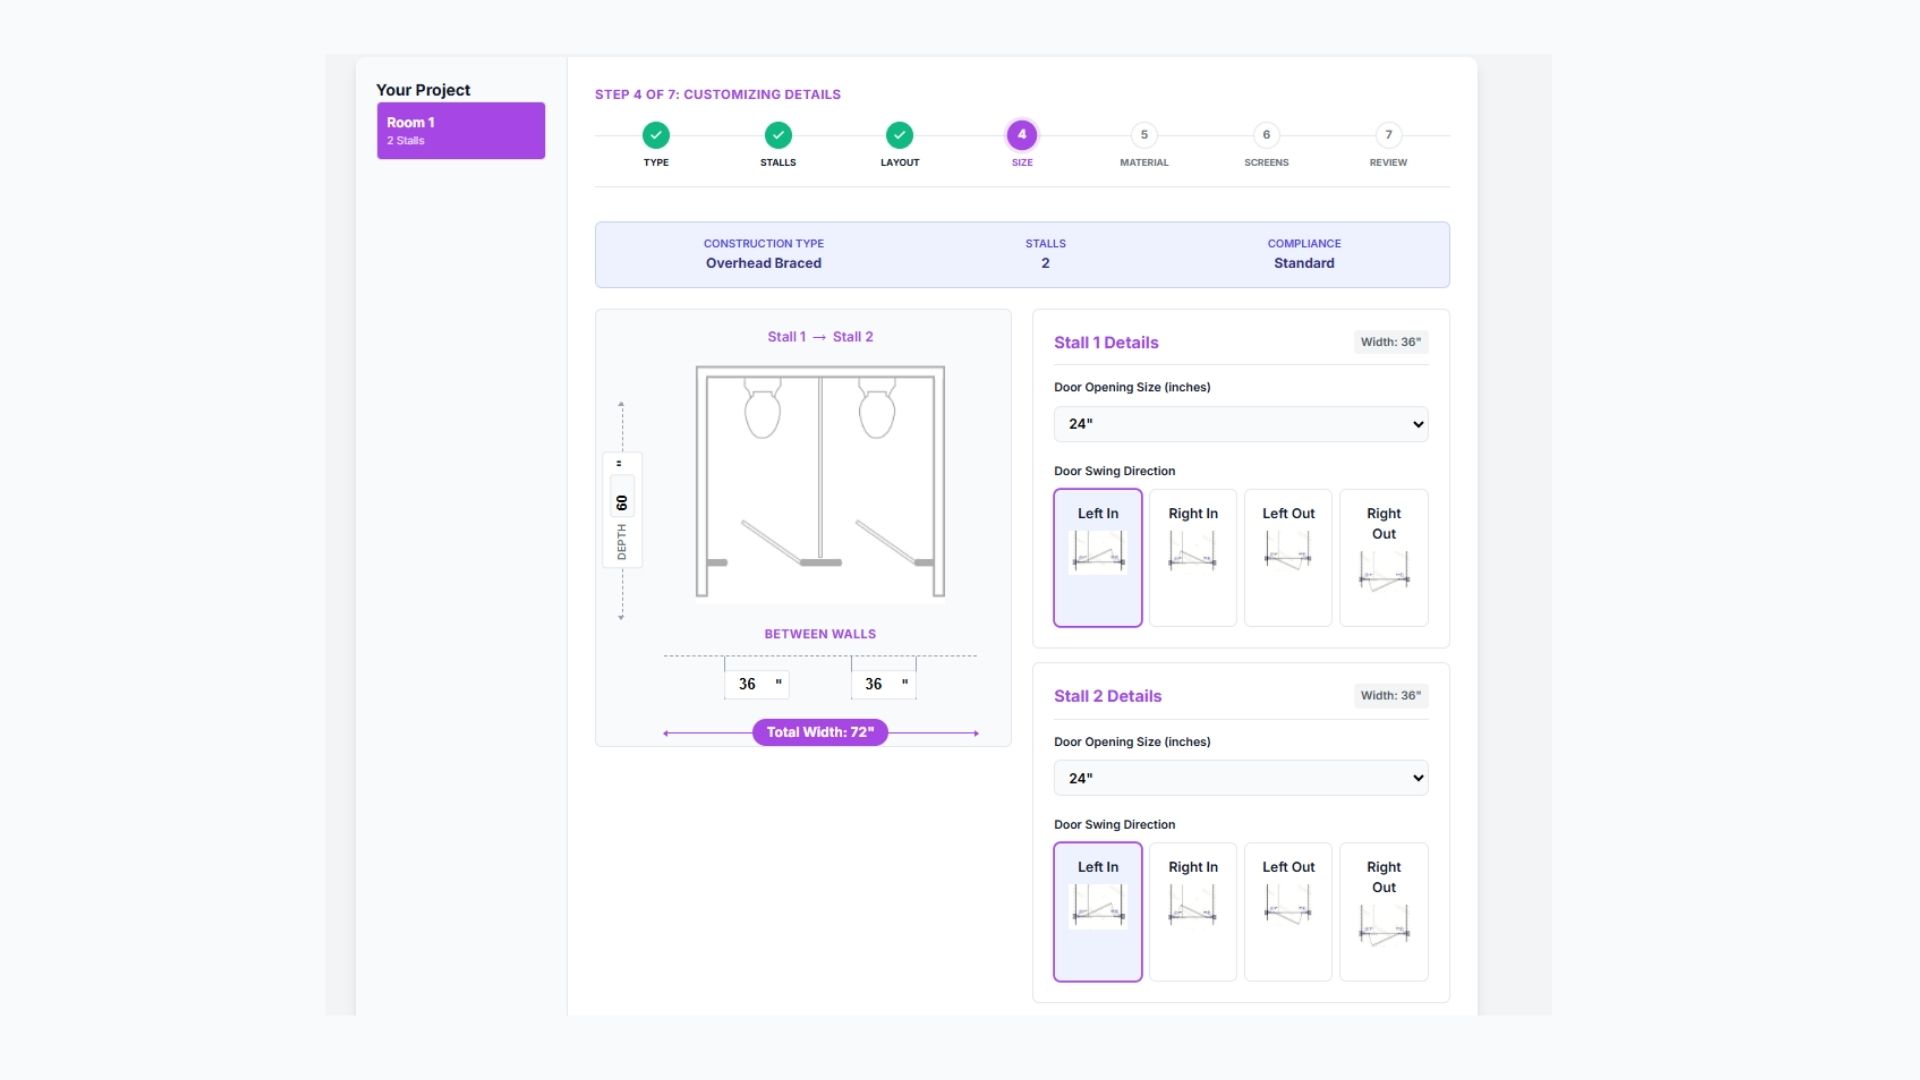
Now dial in the sizes. For each stall you’ll set:
- Stall width and room depth — enter your wall-to-wall measurements and the planner totals the overall width for you.
- Door opening size — typically 24″ for standard stalls, larger for ADA.
- Door swing direction — left or right, in-swing or out-swing, with a diagram for each so there’s no ambiguity.
Have a floor plan, sketch, or spec sheet? You can upload it right here (JPG, PNG, or PDF up to 2 MB). Even a phone photo of a hand sketch helps our estimators confirm your numbers.
Step 5: Select your material
Choose from six commercial-grade partition materials:
| Material | Best fit |
|---|---|
| Powder coated steel | Budget-friendly workhorse for offices and retail |
| Stainless steel | Upscale look, easy to sanitize — hotels, healthcare |
| Solid plastic (HDPE) | Won’t rust or delaminate — schools, pools, gyms |
| Phenolic black core | Very rigid and moisture-resistant for high-traffic restrooms |
| Phenolic color through | Same toughness with a color-matched edge |
| Plastic laminate | Widest range of finishes for design-driven spaces |
Each option shows a photo, so you can judge the look as well as the spec. If you’re torn between two materials, submit with your best guess and ask about the alternative in your message — quotes are free, and we’re happy to price both.
Step 6: Add urinal screens
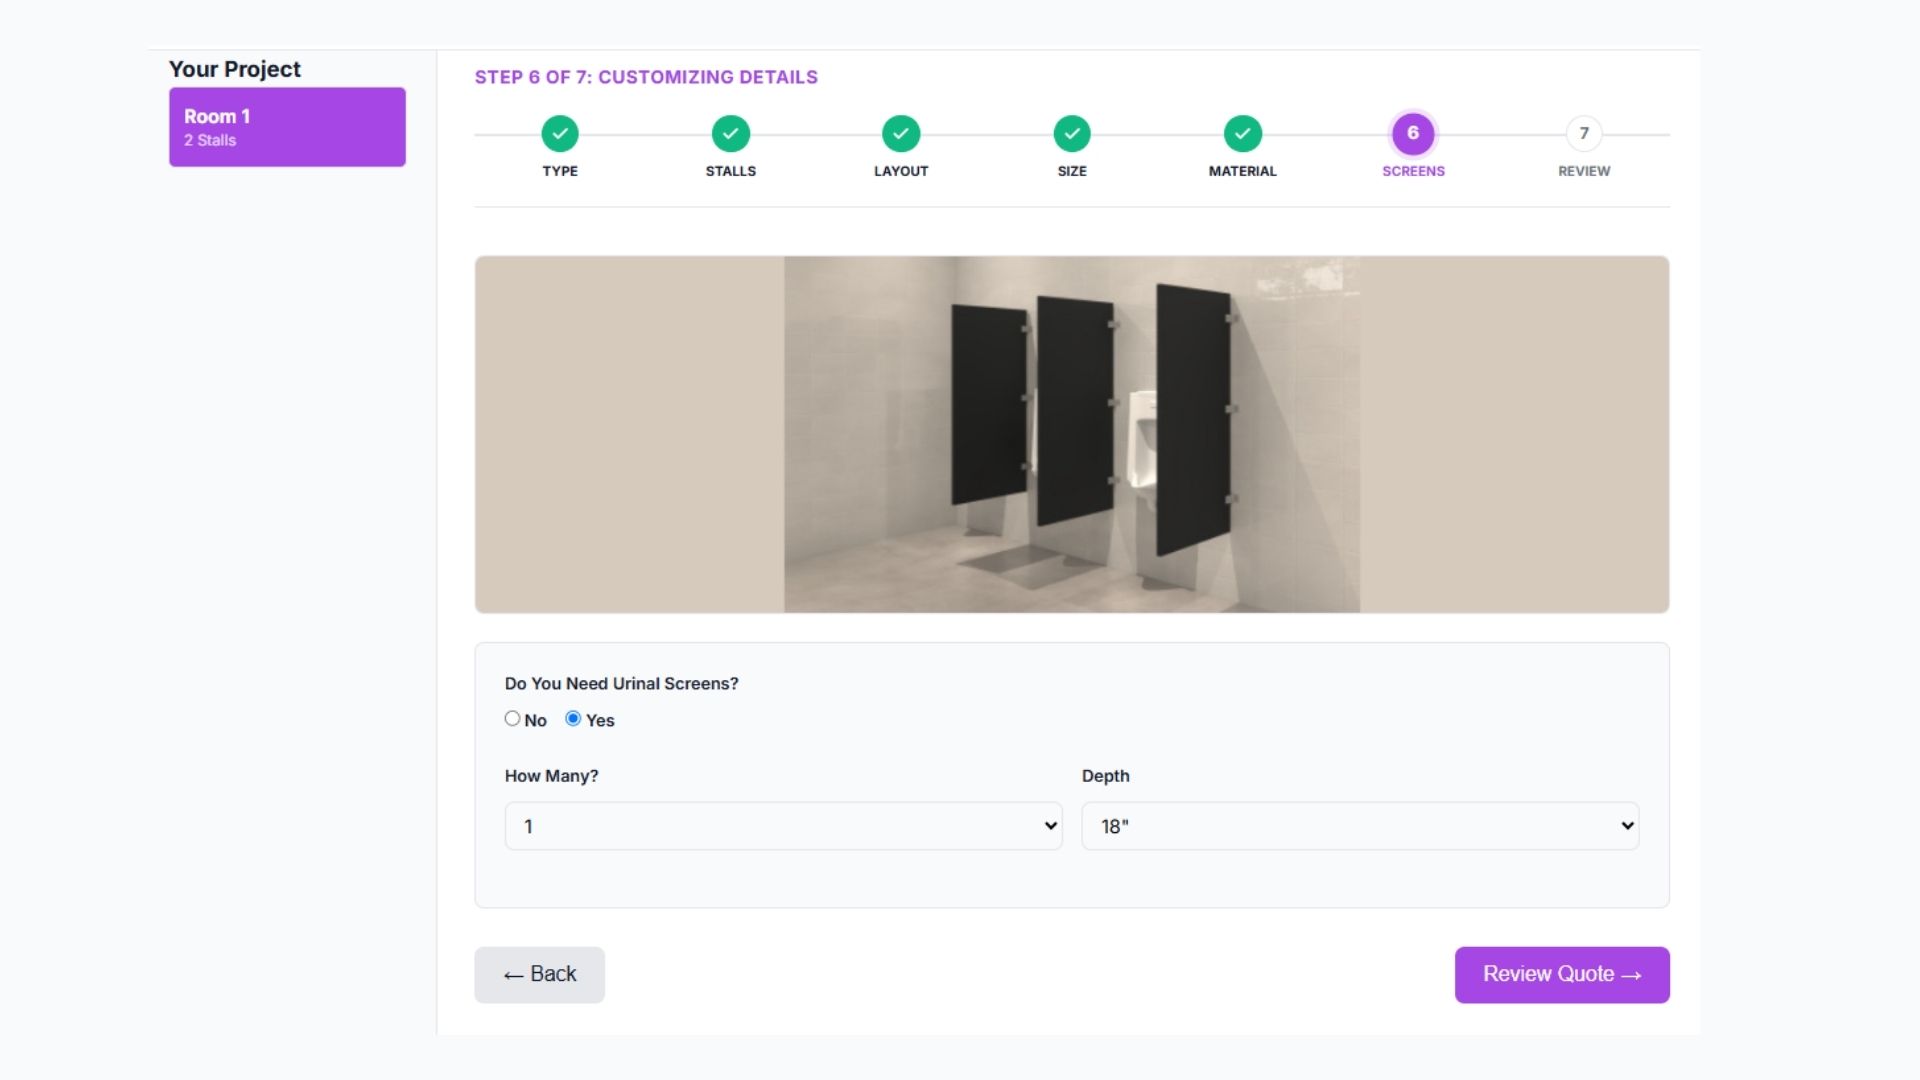
If your restroom has urinals, don’t skip this step. Select Yes, then choose how many screens you need and the depth (18″ is standard; deeper screens offer more privacy). Ordering screens together with your partitions means matching material, matching hardware, and one delivery instead of two.
Step 7: Review, add shipping details, and submit
The final step pulls everything together. Answer one shipping question — whether your site has a loading dock or needs liftgate service (a truck-mounted lift that lowers pallets to street level, common for storefronts and schools) — then fill in your name, phone, email, and ship-to ZIP code.
Check the quote summary, which lists every stall’s width, door size, and swing direction. Need another restroom on the same project? Hit “+ Add Another Room” and repeat the steps — one submission can cover the whole building. When everything looks right, click Submit Full Quote.
You’ll see a confirmation screen instantly with a Reference ID (something like TDP-AAE697), and a confirmation email lands in your inbox. Our estimators review your configuration and get back to you with a quote during office hours (Mon-Fri 8:00am-5:00pm).
Track your quote with your Quote ID
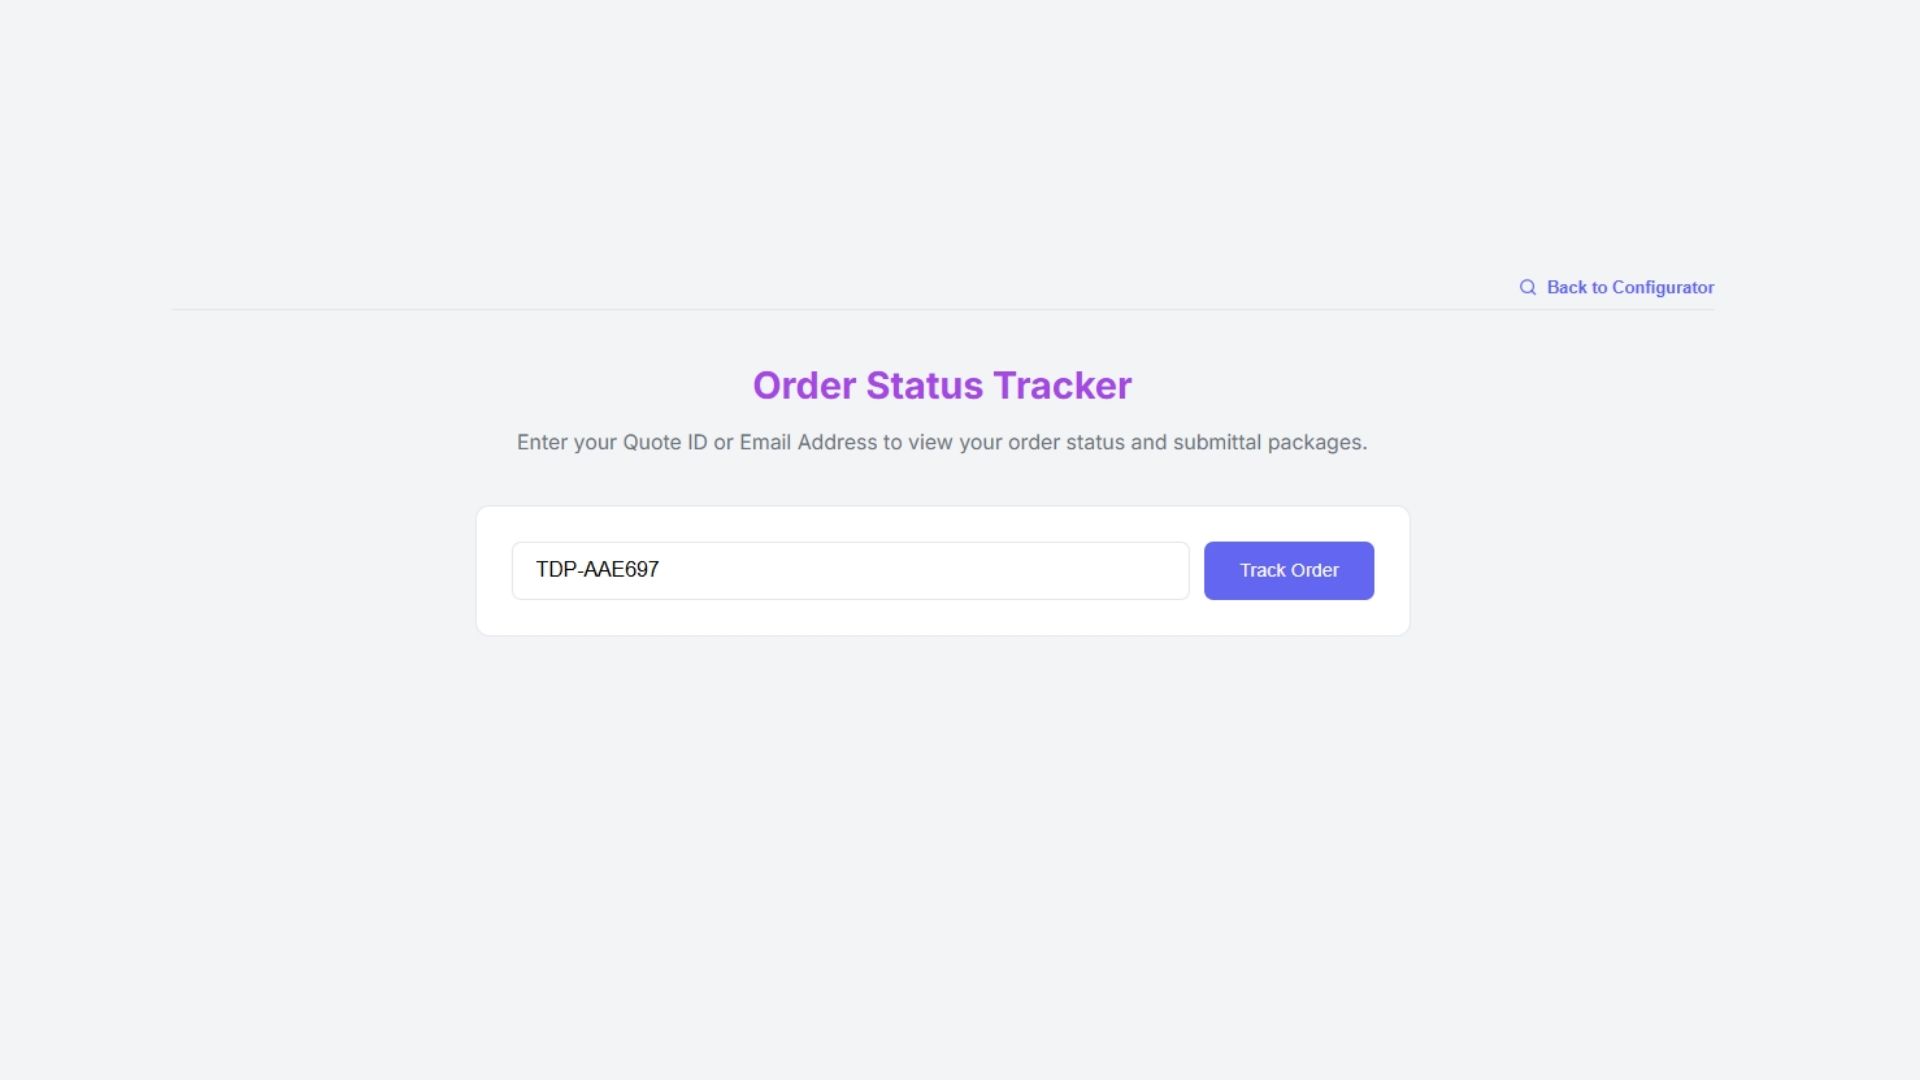
Here’s the part most suppliers don’t offer: you can follow your request online instead of calling for updates.
Click Track Order at the top of the planner, enter your Quote ID or the email you submitted with, and you’ll see your order status, estimated timeline, your full quote summary, and any submittal packages we’ve uploaded for your project. There’s even a message box to send a question straight to your estimator — no phone tag required.
How to Get a Commercial Toilet Partition Quote Online: A Step-by-Step Walkthrough: frequently asked questions
Yes. Configuring your restroom and requesting a quote costs nothing and doesn’t require an account. You only pay if you decide to move forward with the order.
Our estimators review every configuration and respond during office hours (Mon-Fri 8:00am-5:00pm) after submission. You’ll get a Reference ID immediately so you can track progress online.
Yes. Step 3 includes a dedicated ADA toggle that filters layouts to accessible configurations, and you can note specific compliance questions in your submission.
Yes. Step 6 lets you add urinal screens in your choice of quantity and depth, matched to the same material as your partitions, so everything arrives together.
Enter your best estimates and upload a photo, sketch, or floor plan in Step 4. Our estimators will confirm dimensions with you before anything goes into production.
Ready to price your project?
Your next restroom quote is about five minutes away. Configure your layout, pick your material, and submit — our team will take it from there.
Start your free quote at mavi10.test/ →
Prefer to talk it through first? Call us at +1 718-874-3805 or email info@mavinewyork.com — Mavi New York supplies and installs toilet partitions throughout the NYC metro area, New Jersey, and Connecticut.